BLUE-WINGED OLIVE BLOW OVERS

It’s too easy to just do what you always do when you’re fishing home water. Take the Blue-winged Olive hatch—maybe you always start off with the same fly patterns when you see the trout rising. Let’s say a dun imitation to begin with because you’re seeing duns on the water’s surface. Okay, that kind of works, but you amp it up a little by trailing your favorite BWO emerger 15-inches behind the dun on some 6X.

It’s all good. But don’t forget to always take a minute or two to look at the water. It might be that one day when something different is happening. It doesn’t matter if you’ve fished this same stretch of water at the same time of year for the past 25 years.

Blue-winged Olive blow overs.

Blue-winged Olive blow overs.

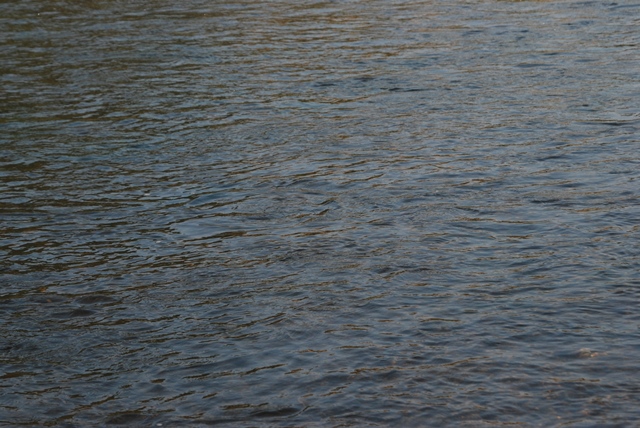
So let’s say it’s another windy day on the river. You didn’t even know the BWO hatch was on until you see freshly hatching duns in a calm backwater shielded from the gusts. Then you notice that the wind has blown some of the duns over before they can get into the air. The unlucky ones are “glued” to the surface film by their newly emerged wings. You look out over the river and it’s only then you see that trout are rising. The wind is doing a pretty good job of obscuring the subtle riseforms. It reminds you of the way trout take spent spinners.

We’ve talked about this before in the Lone Angler Journal. Look at the September 11, 2013 post. It talks about how a BWO spent spinner imitation just works when your usual dun and emerger imitations don’t---even if there’s no spinner fall!

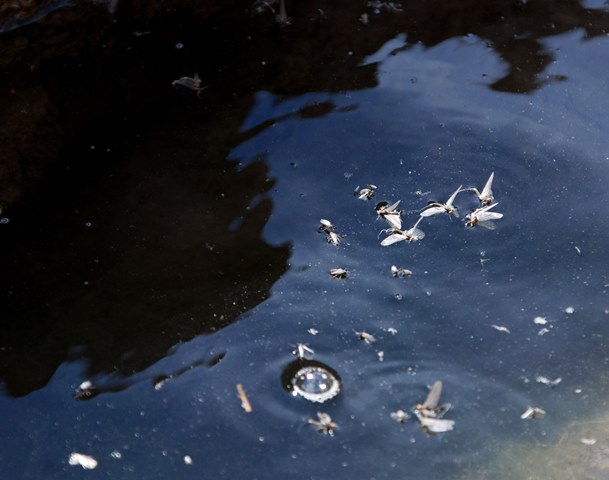
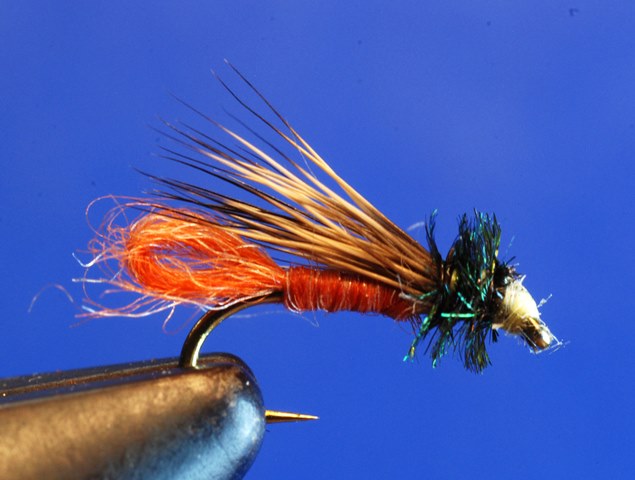
Take a look at these photos I took just last week. For all practical purposes those duns glued to the surface film might as well be spent spinners! So there you have it. Always carry some BWO spent spinner imitations for those windy days and if they don’t work take a scissors to the parachute or traditional hackle on one of your BWO dun imitations and modify it so the fly floats on its side with a wing in the surface film.

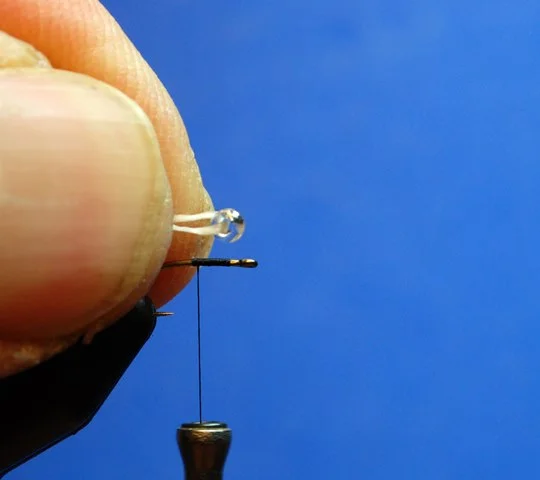
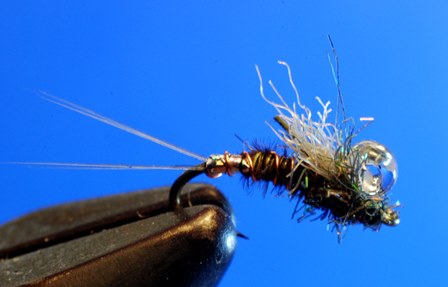
There are all kinds of other fly pattern possibilities or existing fly pattern modifications to cover this windy day hatch phenomena. I just can’t get enough of this stuff. More on this later.

TROUT TRACKS

A "trout track" may be the remnants of a rise that has already occurred.

A "trout track" may be the remnants of a rise that has already occurred.

I call any indication of trout activity on the water’s surface that I can’t readily define as a rise form a “trout track.” A lot of times it’s the kind of nervous water you catch out of the corner or your eye that may be the prelude to a rise or the remnants of a rise that has already occurred. It might also be trout just moving around in shallow water. Sometimes it’s the tip of a tail or fin briefly poking above the water’s surface.

Now and then you’ll see a very subtle rise to a spent mayfly spinner that you can’t immediately identify as a rise, but it sure catches your attention. In other instances you may be seeing just bits and pieces of subtle rises that will take a little more time to sort out. Or maybe the trout are bulging shallow water as they chase down emergers heading for the surface.

More simply put it is this close to subliminal sense that you are on the verge of something happening. Trout are the move. You tell yourself that you’ll learn to interpret every slick, every wrinkle in the water’s surface, every nuance that’s alive and wasn’t there a moment ago.

It’s the most exciting time to be on the river.

SO HOW MANY TROUT WERE THERE?

inset.jpg

There have been a few pleas for at least a hint on how many trout there are in the image I posted on March 3. So here’s the scoop. If you look at the zoomed-in inset (reproduced above) there are at least two trout and probably a third trout. Things are never for sure when you’re spotting trout.

The trick is to look for parts of the trout that stand out such as pectoral fins, pelvic fins and the straight vertical line of the tail. You might also spot a shadow on the stream bed that looks out of place or the momentarily open white mouth of a trout that’s feeding.

Once you spot one trout carefully study the feeding lane upstream and downstream from where you spotted the trout. If it’s a good feeding position for one trout you’ll often see other trout upstream or downstream of it in the same feeding lane.

Sometimes you’ll just have to go on a hunch. It may or may not be a trout, but if it doesn’t move at all after you’ve made a five or six good presentations it probably isn’t a trout. Don’t be discouraged! You don’t even want to know how many rocks I've cast to thinking they were trout.

Once you've spotted the trout in the zoomed-in inset try to see the same trout in the original image (reproduced below).  

DSC_0063.jpg

SPOTTING TROUT

DSC_0051.jpg

I tell people that the most important thing I learned when I guided fly fishers was how to spot trout. That’s not to say I couldn’t spot fish before, I just got a lot more efficient because I spent more time on the water and I wasn’t fishing. Simply put I had the time to become more observant because I didn’t have the pressure of wanting to catch every trout in the river. Improving my ability to spot trout also figured into my client’s success, so there was also an incentive to get better at it. But at the time I wasn’t consciously thinking about any of this. I just kept trying to see trout so I could put my fishermen on them. The more I practiced spotting trout, the more I began to see.

Spotting trout was possible on the tailwaters where I guided because the water was consistently clear. We spent a lot of time spotting, stalking and then sight nymphing to those trout. It’s still my favorite way to fish a nymph imitation. You get all the visual excitement of dry fly fishing, but since the trout spend the majority of their time feeding below the water’s surface you also get a lot more productive hours of fishing in the day. You also get more opportunities to target larger trout that may not rise to a dry fly.

There was something else I didn’t realize when I was learning to spot trout. I was also subconsciously cataloguing the water type where I saw the trout. I was reinforcing my ability to read the water without even knowing it. I discovered this on those cloudy days when I couldn't see into the water and resorted to “spotting” the water type where I was used to seeing trout on brighter days. More often than not the trout had not moved from those favored water types even though I couldn't see them..

                                                                      &nbs…

                                                                                         SPOT THE TROUT

                                                                                                        I

                                                                                                        I

                                                                               SEE ZOOMED INSET BELOW

                                                                      &nbs…

                                                                               DO YOU SEE THEM NOW?

THE FEVER

Photo provided by a friend who admits to having the fever really, really bad.

Photo provided by a friend who admits to having the fever really, really bad.

VALENTINE’S DAY, 2014. I’m standing forlornly in the Colorado Springs Airport. I’m supposed to be on my way to Denver and then from Denver to Seattle. Instead, I’m in the rebooking line. That’s never much fun and it’s even less so when I find out I can’t get to Seattle until tomorrow. That means I won’t be able to speak or tie flies at the Fly Fishing Show in Lynnwood, WA. I was pretty excited about teaching my “Practical Nymphing” course, too. But that’s also down the tubes. It’s the first time ever I've missed a Fly Fishing Show due to weather delays. I guess it had to happen.

So that’s that, but it’s not even the worst of it. My pal, Jim, had convinced me at the last minute to pack a minimalist fly fishing kit because the recent heavy rains in northern California had busted the sand bars out of the river mouths and the steelhead were on the move. With luck I’d have one day to fish between the Lynnwood Fly Fishing show and the Pleasanton, CA Fly Fishing Show. At first I’d told him it’s just too much to pack all that stuff for just the possibility of a day’s fishing.

Jim says, “Dude, you have to get your priorities right. It’s steelhead. They’re in the river.” Two days later he calls me with a fishing report. “It’s unbelievable. They’re in the river for sure. It’s on right now and they’re going to close the season soon due to low water. He whips me into a steelhead fishing frenzy. I have the fever.

Oh, Mama can this really be the end. To be stuck in Colorado Springs with the steelhead blues again.

WINTER MIDGING

Emphasize segmentation when designing your midge larva and pupa imitations.

Emphasize segmentation when designing your midge larva and pupa imitations.

I’m sitting around today thinking about winter midge hatches. I could say I’m sulking around because it’s too cold and snowy to actually be up on the river fishing. At least it’s too cold for me. Call it the curse of the tailwater if you want to because I know that somewhere on the river the trout are probably sipping midge pupa and if I was there and my hands, line guides, feet and everything else weren’t frozen I’d be casting a tiny midge imitation in their direction. To me winter midging is the master game. It’s never predictable, that’s for sure.

Let’s say you thoughtfully change midge imitations four or five times then on the sixth change a trout nonchalantly takes the fly. You figure that’s it. Game on. You’ve cracked the code. And you never get another take on that midge pattern. So you go back to square one and change fly patterns. The trout don’t like the first one or the second or the third, but maybe the fourth pattern scores. A trout takes it and rockets off upstream. It’s only momentary elation for you, though, because the tip-top line guide is frozen solid. It sounds something like a muffled “Dink!” when the size #22 fly breaks off. Fortunately, you have more of them. Unfortunately, the trout are over that particular fly. It’s back to square one…..so it goes. Besides you’re midging. It’s winter. If you caught and released too many trout your hands would freeze for sure.

Persistence, observational skills, tactical flexibility and an open mind all come in handy when the trout are taking to midges. So where do we start? How about a conversation I had with my friend Glenn Weisner. We were thinking out loud about what fundamental elements to include in a midge imitation that might trigger trout to take the fly. Without hesitation Glenn said, “Segmentation and action.” It’s one of those conclusions that only come after a lot of thoughtful time spent on that water. It’s the kind of time on the water where you’re not just fishing, but also trying to figure out what’s going on.  

Experiment with different materials to get different segmentation effects.

Experiment with different materials to get different segmentation effects.

So try using a variety of different materials to emphasize segmentation in your midge larva and pupa imitations.  When you fish those patterns twitch them once in a while. Figure out ways to let the current subtly swing or lift your fly at the end of the drift. Try using the fly rod to lift the fly during the drift or any way you can think of. That little bit of action may the last bit of encouragement that a trout needs to take the fly.


AS GOOD AS IT GETS

DSC_0135.jpg

Every fly pattern has a life of its own. Less than a month ago we talked about a Blue-winged Olive emerger pattern that I always seemed to be tweaking and how there are other fly patterns that I haven’t “messed” with for years.

The fly pattern you see here today is one that a long-time South Platte River fishing guide showed me right when I got into the guide business. I don’t remember if he explained what it imitated or if it just worked well or what. At the time I was so anxious about just getting my “clients” into trout I was grabbing at anything that might give me an edge. And believe me this fly pattern caught trout. You could fish it subsurface as an unweighted point or dropper fly in a two-fly nymphing rig. You could dead-drift it or drag it. When the trout were on it they didn’t care. Sometimes I even fished it as a dry fly.

Engle 006.jpg

The only drawback was that the little “nymph” was pretty much only effective around the time of the Yellow Sally hatch. A few years later I discovered the reason why that was true. I was eating lunch by the river when I noticed what looked like a little stonefly nymph with stubby wings making its way up a blade of grass. I don’t think it was quite ready to fly off yet, but it was transforming into an adult Yellow Sally in front of my eyes.

The fly imitation the guide had shown me several years before was a pretty good, if impressionistic, imitation of that that little stonefly nymph. Sometime later I took a photo of a natural that had somehow managed to crawl inside my eye glasses. I had to figure that the guide had seen one of these little stoneflies and set about to imitate it. I have always considered it the perfect guide fly—easy to tie from readily available materials, durable and effective.

Of course, I went through a period of time where I tried to put my mark on the fly by “improving” it. I changed the abdomen from the rusty-orange colored sparkle yarn to red wire. The trout didn’t care much for that particular improvement, so I tried reddish-orange goose biot for the abdomen. It really looked cool and was more realistic than the sparkle yarn, but the trout ignored it, too. At one point I tried adding a gold bead for weight. The trout didn’t like that, either. I won’t go through the whole list.  But I finally realized that the fly was as good as it was going to get just the way it was.          

So, take it from me. This was a fly pattern that was impossible for me to complicate or improve in any meaningful way. I try to remember that when things start to get out of hand at the fly tying bench. I repeat the mantra, “simple and durable, simple and durable, simple and durable…..”

But I do always leave the door ever so slightly open for those more involved flights of fly tying fancy. I mean I don’t always tie flies just for the trout.


DSC_0135.jpg

FLY RECIPE

HOOK: Dry fly hook,  size #18.

THREAD: Yellow.

ABDOMEN: Rusty-orange sparkle yarn (one-ply only). 

WING: Deer hair.

THORAX: Peacock herl.


WHAT TROUT SEE

DSC_0238.jpg

I spent the better part of last night and today trying to figure out where I’m at on the “what trout see” question in regards to my fly tying and fishing. It’s now dark outside and I’m no closer to a scientific data driven conclusion than I was when I started. The reality is it’s more like scientific data driven confusion. But it’s been a hoot reading the scientific journals and popular fly fishing literature on ultraviolet (UV) vision and trout, the visibility of fluorescent colors in “dirty” water and the impact of background color to what trout see.

I’ve always been interested in this kind of stuff, but the conclusions I come to often have as much to do with the angler as the science. Maybe your confidence in a fly pattern is as important as the science behind the materials you used to tie it. If you believe a certain material gives you an edge or a certain fly pattern gives you an edge, I say go with it until proven different. I also say don’t disregard matching the size, silhouette and color of a natural at least as a starting point. Mimicking the behavior of any naturals you see can’t hurt either. If a Blue-winged Olive nymph is actively swimming to the water’s surface during emergence it makes sense to actively fish your imitation, especially if a dead drift isn’t working that well.

Read the science. Read the non-science. Hang out with and learn from other fly tiers and fly fishers. Review all your fly fishing fundamentals. There’s still plenty of time for the razzle-dazzle and the solitary late night contemplation at the fly tying bench where you decide what to try next. Then go fish. Let the trout decide if it works.

“Success is mostly luck and luck is mostly persistence.” Whoever said that must have been an angler.


THE "DENTAL FLOSS TRICK" FOR MOUNTING A BEAD ON TOP OF THE HOOK

DSC_00481.jpg

A bunch of you asked how I mount the silver lined glass bead on top of the hook as shown on my December 19 post. Some tyers use wire to lash the bead on. I’ve seen others take a length of thread and actually tie the bead on top of the hook shank by going through the hole in the bead six or seven times.

My friend, Rick Murphy, a fly designer for Rainys Flies, showed me the "dental floss trick.'. Rick said that he first saw flies tied with the bead on top of the hook when he was fishing New Mexico’s San Juan River tailwater. He said that he wasn’t 100 percent sure, but he thought that long time San Juan River guide and fly designer Johnny Gomez came up with the idea of using unwaxed dental floss to mount the bead.

It’s important to use unwaxed dental floss because waxed floss will gum everything up. The advantage of using unwaxed floss over other materials is that it’s flat and doesn’t roll like wire does when you try to lash it down. The “floss trick” is a lot easier to do than any other way I’ve tried and it’s faster, too.

You can take a 5-inch or 6-inch section of dental floss, tie an overhand knot on one end and “load” it by stringing on six or seven beads and then moving them up the floss as needed when you’re tying.

Check out the sequential photos and instructions:


DSC_0059.jpg

Start the thread just behind the hook eye.

DSC_0060.jpg

The silver-lined glass bead strung up on the dental floss.


DSC_0061.jpg

Fold the floss over to form an open loop.


DSC_0065.jpg

Position the loop to hold the bead with the hole facing you.

DSC_0069.jpg

Lash both ends of the dental floss loop to the hook while maintaining the bead position.

DSC_0071.jpg

Trim one end of the floss off short.

DSC_0072.jpg

Trim the other end a little longer. This will give you a nice taper when you wrap over it with the tying thread

DSC_0075.jpg

The nicely tapered thread base.


FINALLY.....

DSC_0078.JPG

You can take a 5-inch or 6-inch section of dental floss, tie an overhand knot on one end and “load” it by stringing on six or seven beads and then moving them up the floss as needed when you’re tying.

REFINEMENT LEADING TO THRIFTY DESIGN

10.jpg

Here’s a new incarnation of a Blue-winged Olive emerger pattern I came up with a several years ago. I don’t know why, but I’m always fooling around with this fly trying to reduce it to a primal essence. I tie other patterns that I haven’t messed with for decades. It’s weird how that happens

My idea for this BWO emerger design has always been to imitate the mayfly at the moment it’s struggling to emerge from its nymphal shuck. The silver-lined glass bead mounted on top of the hook represents the wings just as they are popping out of the shuck. They really do look like a silvery/clear ball at that moment. The silver tag at the rear of the hook imitates the highly reflective air (gases?) left in the shuck as the mayfly pulls out of it.

11.jpg

If you’ve watched me tie flies at the Fly Fishing Shows you’ll know that most recently I’ve been tying this pattern with a very sparse parachute hackle wound around the base of the bead. The point of the hackle wasn’t to float the fly for the entire drift, but only to slow it down a bit when it began to sink. In practice, I’d trim the hackle off or at least thin it even more if I wanted the fly to sink faster.

A few nights ago at the tying bench it occurred to me that I could get the same effect by just adding a bit of polypropylene or similar synthetic as a stubby, sparse “wing”. I ended up settling on Light Gray Para Post wing material mainly because I had some on hand.

The same rules apply when I fish this newest incarnation. If I want the emerger to sink more quickly I just trim the wing back or off altogether. The advantage of this version of the emerger is that it’s more visible on the water and I don’t have to feel guilty about wasting a perfectly good dry fly hackle simply to slow the fly down when it begins to sink. The Para Post material also makes the fly easier to tie.

Refinement that leads to thrifty design is where it’s at for me, but I seldom achieve it on the first try and I’m sure this latest incarnation won’t be the last.


DSC_00481.jpg

FLY RECIPE

HOOK: TMC 200, size 20.

THREAD: Black.

TAILS: Gray synthetic tailing fibers.

TAG: Holographic tinsel.

RIB: Copper, size small.

ABDOMEN: Olive Pheasant tail.

WING: Light Gray, Hareline Para Post Wing.

THORAX: Hareline Peacock ICE Dub.

BEAD: Spirit River, Hi-Lite Glass Bead, Crystal, size small.